Freestyle Cat


Freestyle Cat
Back in February of 2012, one of the new live streaming websites was called Vokle. I don't think it's around anymore but I did try it out once...while doing CATS makeup of course. I did not feel like replicating any of the characters so I just sort of put the makeup on without really thinking and a character emerged. Freestyle. These photos are among those I thought were lost forever but were recently recovered from and old hard drive. Enjoy!

Freestyle Cat Freestyle Cat
Freestyle Cat Freestyle Cat Freestyle Cat


Found Favorites #24 Inspiration

It's no secret that this blog has been suffering a bit lately. I know I've mentioned it here that I plan to get back into blogging more frequently once I'm married but I still feel like I need to check in every so often anyways. I've collected some inspiring blog posts to help me get back at once I have the time. Hopefully they can bring you some inspiration as well. (and give you a glimpse at what my favorite blogs are) They are not all specifically about blogging but some life advice as well, things that make me feel like 'okay, I can do this.' Also, since I have you here, please comment with what type of content you want to see on this blog this summer. I would love to hear from my readers and know what your favorite posts are. As always, thank you for reading!

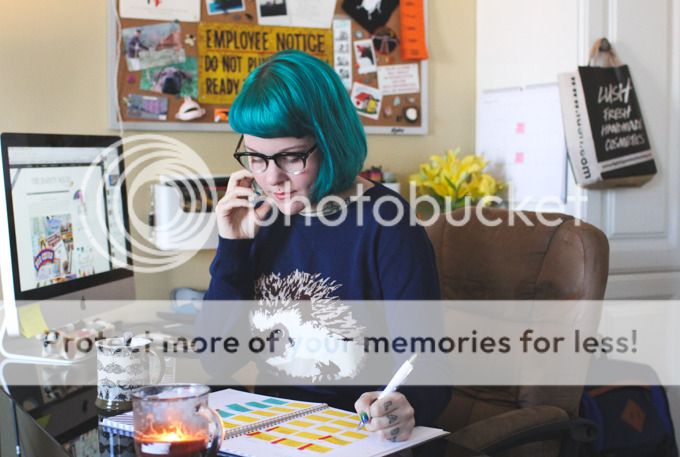
The first post on the list is from one of my all time favorite blogs, The Dainty Squid. It's about how her full time career is being a blogger and how it's not as weird as some people think.


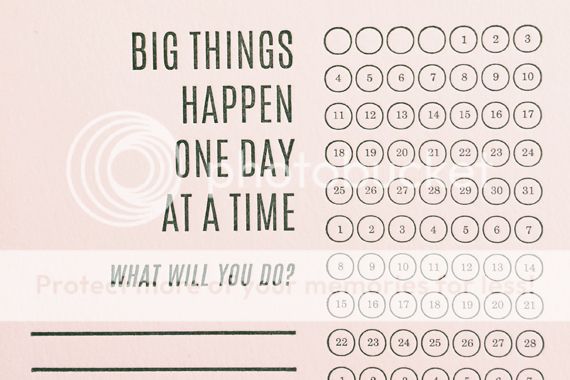
The second post
 on the list is from the blog Enjoy It. It is about tips for success with long-term projects, which are things I defiantly tend to start. In fact her Make29 project sounds a lot like my Nerdy Monsters 2014 project where I released a new product each month.


The third post is from Because of Jackie. She talked about her idea of a capsule wardrobe that's actually not. I've been feeling the same as her and that's I like the idea of a capsule wardrobe but I don't want to limit my fashion creativity. I like her solution.


I'll admit, being absent from posting on my blog (besides my videos) also means I've been absent from reading a lot of blogs as often as I used to. (Something that will also change after my wedding.) So as I browsed my Bloglovin lists, I was sad to see that a lot of my favorite blogs were on hiatus or had not posted for months. I hope they come back.


Magic Card Trick (and CATS Makeup)


Looks like I'm at it again, turning my friends into Cats. This time however, it was Scott's idea. This is Scott, he does magic. Watch as I turn Scott into a cat and then he does some magic. Here on MagicCatJenny...get it...ehhhh!! *cricket noise* ;D


Buffy The Vampire Slayer: Season Two

BuffyDoodles season 2 is done! What do you all think? There might be some spoilers so scroll down only if you don't mind. Be sure to follow BuffyDoodles on Tumblr to get a new doodle a day, or follow me on DeviantArt, where I'll be posting each doodle (on no real schedule).


How To Make Mickey Ears


Here's a simple tutorial for how to make your own DIY Mickey Ears!

Supplies Needed

  • headband
  • black felt
  • black craft foam (sticky back not required but saves time)
  • hot glue gun (*hot glue burns! don't use without adult supervision!*)
  • white crayon
  • cup
  • fabric scissors (regular scissors will work if you don't have fabric scissors)
  • any additional accessories/decorations you want
The first step is to cut a strip of your black felt long enough to cover the length of your headband.


Start hot glueing the felt to the outside of the headband.


Once you've gone all the way around you're ready to glue the sides and ends down as well.


Your headband should now look like this.


Then you need to cut two circles out of the craft foam. Use the white crayon to trace around the lip of a solo cup to get the shape. 


Then to the same to the felt but for each ear, trace two circles about a half an inch apart and connect them with the crayon and cut them out.


This next step depends on the size of your headband. Place the foam circle on one side of the felt circle unit and line it up on your headband. You'll need to cut a straight edge on the foam that will rest on the headband. 


Once you've got it the right size hot glue (or stick if your foam has a sticky end) the foam to one side of your felt unit.


Then, line the ears up on your headband to see where you want them to go. If you have a pair of ears from the park you can use them as a guideline.


One you know where you want them to go, hot glue the base of the felt unit to the inside of the headband and then hot glue the other side of the felt to the foam.


Ta-da! You just made Mickey ears!


You can also hot glue on a bow or fake flowers or anything to make them Minnie ears or whatever you want!


I made those flower ears on camera with imSarahSnitch, check out our video below!


“How